Sunday, July 26, 2009

Capellini with Pan Seared Scallops and Back Bacon


HY was out having dinner with friends this Friday night. Just back from office and lazy to get food in the nearby hawker centre. So I decided to ransack my fridge to see what's there for cooking a dinner good enough for a lonely husband. I cooked a portion enough for two, ate one portion and kept one portion in the fridge. The capellini that I heat up in the microwave the next morning still taste pretty good. Glad HY's not keen on heavy breakfast ..... Slurp!


Ingredients (for 2 servings):

2 servings of capellini or angel's hair
4~5 slices of back's bacon chopped up into small pieces (my last few slices that's gonna go overdue)
4 pieces of scallops (frozen US scallops, I'm sure you'll do better with the fresh ones)
1 sprig of rosemary
1 sprig of thyme
1 sprig of parsley
6 tablespoons of extra virgin olive oil
1/2 onion chopped up finely
1 tablespoon of olive oil
1 tablespoon of butter

Method :

Making the herb with olive oil
1) Chop the rosemary, thyme and parsley leaves into fine bits. Scoop up about 1 teaspoon and place into a soup bowl.
2) Add 4 tablespoons of extra virgin oil and mix them up. Leave them aside.

Stir frying the onion and bacon
1) Heat up 1 tablespoon of oilive oil and stir fry the chopped onions. When the onions are softened, leave them aside in a plate.
2) Place the bacon in the pan and stir fry with medium heat until some fats melt off the bacon and the edges slightly brown. Add the onions back into the an to stir fry. Leave them aside.

Pan Searing the Scallops
Melt butter in the pan and place the scallop on one side. Cover the pan with a top. Flip the scallop over when one surface is slight browned. Repeat on the oppsite face of the scallop. Leave the scallops aside to drain off excess butter when they are done.

Preparing Capellini
1) Boil about 500ml of water. Cook the capellini with the boiling water for 2~3 minutes until it soften and able to swirl freely in the water. Do not overcook.
2) Strain away the water and rinse the capellini under the tap for a while. Toss the capellini in the strainer to drain as much water out as possible.
3) Whisk the olive oil and herb mixture to "wake" it up. Place the capellini into the the bowl and mix gently.
4) The onion and bacon into the bowl and mix them up.

Plating
Split the capellini into 2 plates and the top them with 2 scallops each. Sprinkle a little parsley flakes over the scallops.

Saturday, July 11, 2009

My "Ferocious" Lobster Bisque Recipe


Ingredients to serve 4 people
2 fresh lobster (about 1kg each not too big as the meat becomes tougher)
3 cubes of Fish Stock (Knorr brand)
3 litres of water (for stock)
1 tablespoon olive oil
20g of butter
2 carrots (chopped)
2 stalk of celery (chopped)
1 large onion (chopped)
4 tbs white wine
1 teaspoon Parsley flakes
200 ~ 300g of tomato paste
200g of thickening cream
1 tablespoon flour (for starch)

Preparing the lobsters:

1. I got the lobsters fresh from the seafood seller and got them to separate the lobster head and body (save me the hastle of chopping a flustered lobster). I got them to trim the feelers short too. Bring it home to refrigerate until you need to use it.

2. Before cooking wash the lobster under a running tap with a medium soup pot. At this point the lobster may still be moving but not as vigorously now (you may still see little twitches and movements but nothing spectacular). Pour away the water and leave it aside.

3. Flip the tail end of the lobster with the underside facing upwards, the top hard shell on a chopping board. Cut a slice on the soft shell, using a scissors, to expose the meat inside. The shell here should be softer than the top side. This is to allow the meat to be more uniformly cooked later. I was trying to use the top side as a decoration so I'm not creating any incision on the top shell. Otherwise, simply split the lobster tail in half with a knife.

Method :

1. Throw the 3 cubes of fish stock into the soup pot (I used a 12" soup pot) into 3 litres of water. Bring the mixture to a boil and then turn to low heat and continues to simmer.

2. While the fish stock is cooking, heat up a frying pan, add the olive oil and then the butter. Stir fry the carrots, onion and celery until they are soft and then add them into the pot of fish stock.

3. Add the 2 lobster heads into the soup pot (at this point I still see some feelers and leg movements even when the lobster heads were severed 2 hours ago). With a big soup ladle, place a lobster tail into the soup pot until the meat is half cooked (if the lobster tail is not split as mention above, the meat will not be cooked uniformly). Put the half cooked lobster tail aside in a plate. Repeat with the next lobster tail. Leave the stock to simmer.

My lobster heads in the pot of vegetable and fish stock


4. Remove the lobster meat from the tail carefully (so that the tail shell will not be damaged, else the lobster bisque don't look as "ferocious" anymore). Throw the shells back into te stock to simmer with the head. Cut the half cooked lobster meat into smaller bite chunks.

My Half Cooked Lobster Meat


5. When the stock is reduced to half, remove the vegetables, shells and lobster heads. I used a strainer and ladle for this purpose. Keep the lobster heads and lobster tail shells. Throw the rest away (not the soup stock OK?). At this point, taste the soup stock as a reference.

All strained out


6. Add 4 tablespoons of white wine and stir the soup.

7. Add 1 teaspoon of parsley flakes ( you can used fresh parsley if you like) into the soup.

8. Add the tomato paste in portions and stir. Taste the soup to see if you'll like more tomato taste over the lobster's flavor. You don't want so much that you end up drinking tomato soup. Leave the soup to simmer for 10 mins.

8. Add the thickening cream and stir till the soup is uniformly colored. At this point judge if you'll like the soup to be thicker. If you'll like to add the starch in gradually till it's your prefered thickness.

9. Split the lobster meat into four portions. With a ladle, dunk each portion, into the soup until its just cooked and then placed the meat into the soup plate.

Plating

Normal plating - Pour the soup into each soup plate and sprinkle some parsley flakes. Add some more wine if you'll like to. Add a dash of salt and pepper to taste.
My "Ferocious" Lobster Bisque plating - Placed the lobster head at on end of the plate and the lobster meat at the center and then followed by the lobster tail shell (see first photo at the top). Sprinkle some parsley flakes and then add a dash of salt and pepper to taste.

Close up of the chunks of meat between lobster head and tail

Sunday, July 5, 2009

姜汁撞奶 "Collision of Ginger Juice and Milk" ........ Ginger Pudding


As a lover of both ginger and milk, I came close to ecstasy when I had Ginger Milk Pudding in dessert shops or restaurants. The first time I came across Ginger and Milk Pudding was in the streets of Kowloon, Hong Kong. In Cantonese, they call it, 姜汁撞奶, directly translated as "Collision of Ginger Juice and Milk", which is exactly what it is. I can't imagine how easy it is to create this dessert at home until I tried it today. The goodness of ginger and milk into one. Isn't that marvelous?

My bowl of "Collision of ginger Juice and Milk"


Recipe for 2 servings -

Ingredients :
4 tablespoons of Old Ginger Juice
2 tablespoons of Sugar
400ml of Full Cream Fresh Milk

Method :
1. Extract the ginger juice from some old ginger (click on the link for, "How to extract ginger juice").
2. Pour milk into a sauce pan and add sugar under low heat. Stir gently till all the sugar has melted and leave it to simmer till bubbling just occurs. Remove from heat and stir gently to cool for a while.
3. In a small bowl, add 2 tablespoons of ginger juice. Wake it up by stirring the juice.
4. Steadily pour the milk into the bowl while gently layering the ginger into the milk. After that, leave the mixture to cure for about 10 minutes. Do not stir the mixture after you are done pouring. (When milk is added to ginger juice, a chemical reaction takes place, and the mixture coagulates into a curd like texture.)
5. Repeat step 3 and 4 for the second bowl.
6. When a light tap with a teaspoon do not penetrate the surface, the Ginger Milk Pudding is ready to serve.

Enjoy!

Sharing my Ginger Tea Recipe


I have been a very fond of Teh Halia (ginger flavored milk tea) ever since I was first introduced to the drink by my dad. The lingering spiciness after a mouthful of the drink is what I was most looking forward to. Call this personal sadomasochism if you must.

This type of ginger tea, ginger infused into black tea, is the kind found in the local sarabat stall (An Indian Muslim drink stall). However, the recipe I am sharing is just made from ginger without the black tea. This recipe was imparted to me by a Balinese lady at a spa where I had regular body massage and I love the ginger tea that they made.

I've heard about the goodness of ginger from my grandmother and my mother. Some use it as a rub to relieve pain from sore muscle (as practiced by my grandmother before). Ginger is also used in massage sessions for the same purpose. It is known to improve blood circulation, relieving stomache gas, arthritis and the list goes on ........

Visit Wonders of Ginger which describes the goodness of ginger in a nutshell.
Here's the ginger tea recipe imparted to me from a Balinese lady who works in a spa that I frequent. This is good for 2~5 people. It help me improve digestion and soothe a chronic joint problems.

Simple Ingredients :

1) 2 pieces of old ginger about the size of your palm. It must be the old ginger to get the "oomph" for spiciness. This should be enough to extract 200ml of ginger juice. If there's more than enough, you can store it in your refrigerator and then use it another time.


2) 1 or 2 pieces of honey rock sugar. This type of sugar can be commonly found in Chinese Medicine Hall. You can substitute this with honey. I've tried this with Manuka Honey and it taste good too.


Procedure :

1) Peel the light brown skin off the ginger

I'm using a fruit knife for this purpose which may not be too appropriate but I find that I can easily scrap the skin off the "valleys" between two close branches of the ginger. (Now I use a spoon to scrap off the skin. Works well.)


Peeled ginger


2) Grate the ginger with a grater to a slight coarseness. This is for extracting the ginger juice with minimal cloudiness. I've tried the blender but somehow I prefer the taste of my ginger tea made by manual grating.


My coarse ginger puree

3) Extract the ginger juice by placing the grated ginger on the strainer and then press with a table spoon. There should be better tools then what I'm using for the extraction, but it's all I have that can do the job in my kitchen.

My ginger juice in a glass container. You can store extra ginger juice in the refrigerator to use another day.


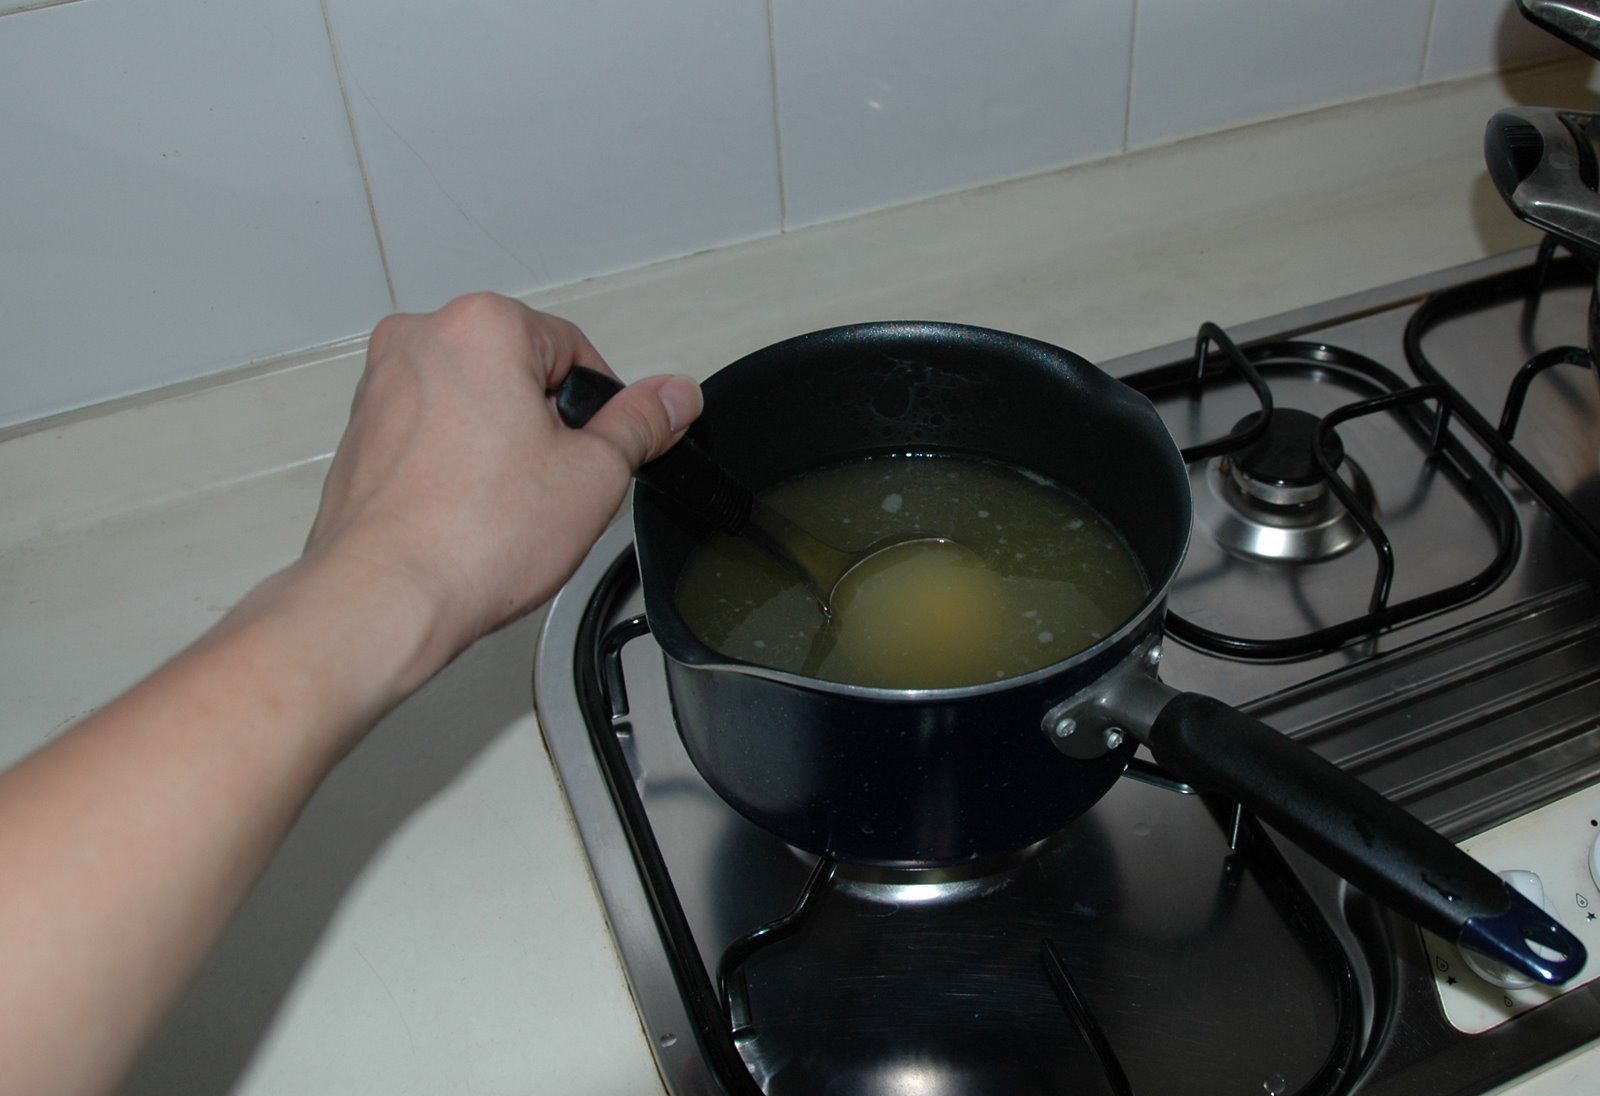
4) With 200ml of the ginger juice mix about 600ml of water. Bring the mixture to boil and then turn to a low flame and then add about one piece of the honey rock sugar. Stir till the solution is boiled. Control the portion of sugar to suit your personal taste. The yellowish mixture will turn brown.


It's ready to be served. Just be aware that it may be too spicy for you. Drink it in small portions or dilute it with more water if you find that it's too spicy.


Wanna try some?

Sunday, June 14, 2009

Egg White & Bacon Omelette with Hollandaise Sauce


I've decided to do something with the back bacon in my refrigerator. Bacon and eggs would be a simple fix but I chose to venture just a little further. So, I made the Egg White & Bacon Omelette to go with Hollandaise Sauce. The Hollandaise sauce goes well as a dip for my toast too!


Recipe serves 2 person.

Ingredients:

Hollandaise Sauce -
3 oz of butter
1/4 cup whip cream
3 egg yolks
1 tablespoon lemon juice

Omelette -
4 strips of back bacon
Egg whites from 3 eggs
1 small sprig of thyme

Method :

Preparing the sauce -
1) Melt the butter in a small saucepan, Remove froth from the surface. Set it aside to cool.
2) Whip the cream till it soften
3) Mix the egg yolks with 2 table spoon of water in a small saucepan. Whisk for 30 seconds. then whisk over very low heat for 2~3 mins until the mixture thickens. Remove from heat. (Do not heat the pan too hot or else you'll end up with scrambled eggs)
4) Add cooled butter a little at a time. Whisk well eachtime the butter is added.
5) Add lemon juice and whisk slowly just to mix.
6) Add whip ceam into mixture and slowly fold them into the mixture with a spoon.

Preparing the Omelette-
1) Grill the back bacon in 250 degrees C heat for 10~15mins or untill edges are charred. Remove to cool.
2) Heat up a small pan in small heat and drizzle the pan with olive oil.
3) Add a layer of egg white and then place 2 slices of the bacon over the egg white.
4) Add more egg white till it covers the bacon (Make sure there's enough egg white for another serving).
5) flip the omelette and heat for 10 seconds and plate the omelette.
6) Repeat for the next omelette

Plating -
1) Pour the Hollandaise sauce over the omelette
2) Add a little thyme sprig to add a little fragrance
3) Add some black pepper

Monday, June 1, 2009

Pork Loin with Aracena Whiskey Sauce


My wife bought the "Appetite" magazine that featured Peter Kaminsky's "Perfect Pig" among other meat related food books. I purchased the book following my personal inclination to pork dishes. Pork Tenderloin with Aracena Whiskey Sauce was chosen as part of the birthday present for my wife and I am glad that she enjoyed it. Thanks to Peter Kaminsky and Susi Delgado. Happy Birthday Darling!

Hopefully, this dinner helped erased her bad memories from my experimental "purple" pork chops with an overdose of balsamic vinegar.

Here's my presentation of Pork Tenderloin with Arcena Whiskey Sauce with the recipe adapted from Peter Kaminsky's "Perfect Pig", inspired by Susi Delgado Gonzalez at Bar Manzano.

Ingredients :

For Whiskey sauce -
6 cloves of garlic, skin on
2 tablespoons olive oil
2 tablespoons butter
2 tablespoons beef stock ( I substituted this with 1/4 cube of Knoss chicken stock)
Juice of 2 lemons
2 tablespoons bourbon (Got the Jim Bean bourbon whiskey)

Preparing Pork -
2 pounds boneless pork roast or tenderloin (I've used pork loin instead). Cut the boneless pork loin into strips 1 inch by 1 inch by 4 inches.

Method :
1. In a saucepan, dry roast the garlic over medium-high heat until the skin chars.
2. Add olive oil, butter, beef stock, lemon juice, and bourbon (any brown whiskey can be used. Bourbon is prefered for its smooth smokiness)
3. Reduce over medium flame approximately 10 minutes and then set aside.
4. Cook pork loin in a cast-iron or heavy All-Clad-type pan about 7~10 minutes, turning frequently.

Plating -
Slice the pork parallel to the long side of each piece. Fan out 3 or 4 slices for each serving. Spoon the whiskey sauce with whole garic cloves over the pork.

Saturday, May 30, 2009

Mini Chicken Burger with Garlic Mayonnaise


The Mini Chicken Burger with Garlic Mayonnaise recipe is adapted from the recipe book "Chicken - Best Ever Poultry Recipe". I've decided to make it into smaller mini portions for the after morning run breakfast. A cup of Coffee Chari, Vietnamese Coffee from Cafe Mai (compliments of my brother and sister-in-law who came back from Hanoi),  after the burger makes it a satisfying breakfast.

(Recipe to serve 2 persons, or 4 mini burgers).

Ingredients:

1 chicken breast, with bones and skin removed
2 teaspoon of lime juice
1 tablespoon of sweet chilli sauce
(Opitonal - 4 mini slices of bacon)
4 mini buns (for convenience bought mini butter rolls)
1 tomato sliced
2 few leaves of Romaine lettuce

For Garlic Mayonnaise
1 egg yolk
1 clove garlic crushed
1/2 tablespoon Dijon mustard
1 tablespoon lemon juice
2 table spoon olive oil

1. Cut the chicken breast into 4 equal pieces and place them in a non-metal container (container preferable to be good for refrigerating). Prick the meat with a fork several times. Combine lime juice and chilli sauce in a small bowl and then pour the mixture onto the chicken pieces. Mix them so that the mixture coat the chicken meat. Cover the container and refrigerate for several hours or preferably overnight.

2. To make garlic mayonnaise : place the egg yolk into a bowl with the mustard, garlic, and lemon juice. Mix them up with a fork or a spatula until smooth. Of course, you can do this with a food processor. Add the olive oil and mix till it looks consistent. Cover and refrigerate until required.

3. Preheat barbecue grill or flatplate and then set to medium heat. Lightly grease the hot barbeque grill or flatplate, cook the chicken for 5 ~ 10 minutes until well browned, cook through and turning once. (Optional : Cook the bacon until crisp)

4. Cut the buns in halves. Toast the buns in a grill with the cut faces facing top heater element until a light brown.  On the bun base, layer tomato, lettuce and chicken. (Optional : add bacon slice,  a small slice to just cover the chicken) Top with garlic mayonnaise before finishing with the bun top. Stick a toothpick in the middle of the burger to prevent a collapse.

For less carbo : Replace the buns with lettuce. Instead of using buns in step 4, replace the bun with 1 leave of lettuce. Place the lettuce on a plate, place the tomato, then the chicken (and the bacon if you want it). Top with the garlic mayonnaise and then wrap up with the lettuce.